RSS

Category Archives: BFG

BFG: Basic Shift pt 2- Gores, cuffs and collars

In part 1 we created 1/2 of our shift, putting in the sleeves and sleeve gussets. In part 2, we will be adding the gores and finishing off our shift.

Step 1- Adding the gore
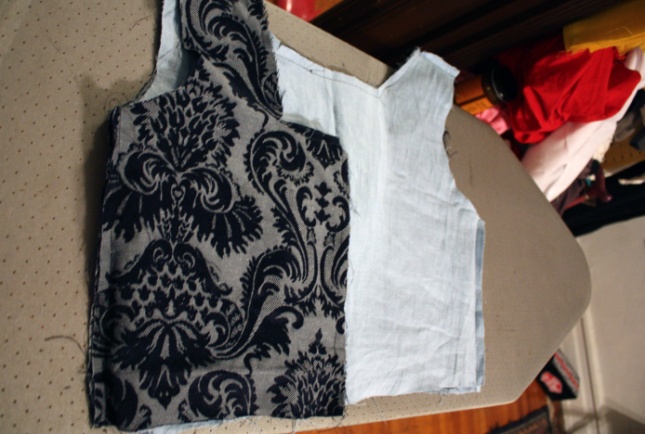
Take a gore at the point. Line this up with the open seam you left at the top of the side. Sew this line down. Go back up to the top of the point. Sew this line down the other side seam. If you have a little bit of a tail sticking up, that’s ok, it works it’s way out in the end.

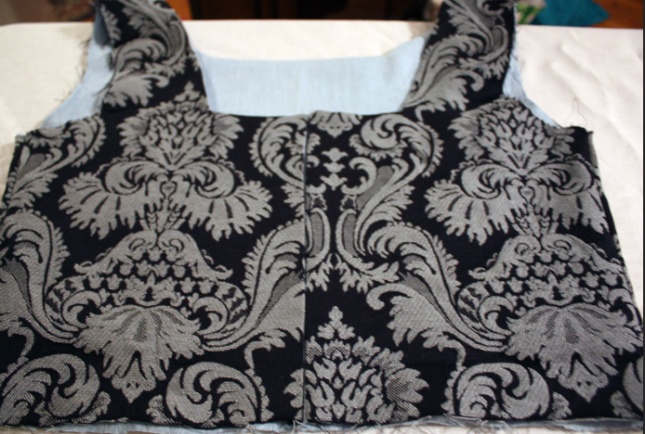
When you open the side completely up, on your ironing board, it will look like this.
ShiftGore

You should find this similar to putting in the gussets. It should be a little easier, since you are not trying to create an armscye at the same time.

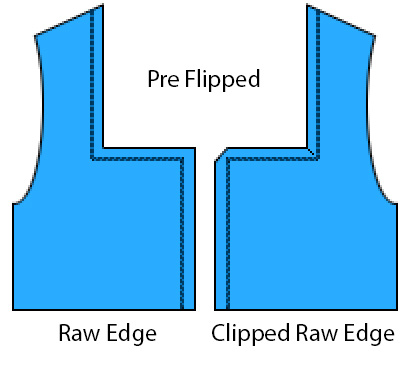
Step 2- Seal, flip, press and sew down
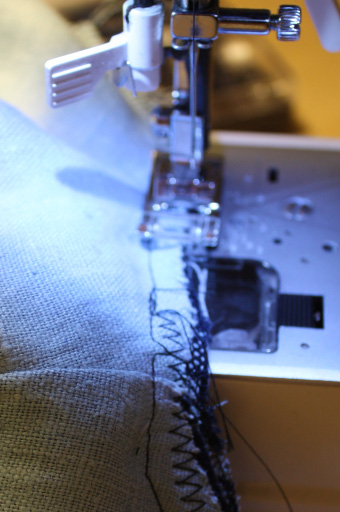
Zigzag your edges. Turn right side out. Press all the seams. Then run a sealing over stitch.

Step 3- Repeat on the other side

Step 4- Cuffs
Cut out a cuff. I make mine about an inch larger than what will go around my wrist. This allows for a button and 1/2 seam allowance. I like my cuffs a little wide so when folded they measure 1.5-2″ wide. There is a 1/4 turned up on each side, to create the edge that gets attached to the shirt. If you want a full shirt sleeve, with lots of poof, you sleeve cuff will be 2-3 times longer than the length of the cuff.

CuffStart

Step 5- Attaching the cuff
You can pleat or gather the extra length of the sleeve prior to attaching the cuff. Pin it in place.
CuffPin

You can hand sew the cuff on or machine sew it.
Cuff

Step 6- Repeat

Step 7- Turn Collar
With the wrong sides out, iron a 1/4″ fold of the collar. When you flip this, the fold will be on the inside of the shift. This creates a nice edge to bind to the shift.*
neckline

When this is done snip the corners and flip and press. Stitch it down 1/4″ from the shift opening/edge. You will run a second stitch along the now turned bottom edge of the neckline lining.

Step 7- Trim and hem
Trim the bottom hem of the shift. I like mine to be a bit rounded.
ShiftFull

The completed shift has a decorative edge along the neckline and sleeves that have a simple embroidered edge in black silk.
ShiftClose

*This is the collar of a man’s shirt. I forgot to take a pic of the shift. The principles are exactly the same.

 
Leave a comment

Posted by on February 18, 2013 in BFG, Technique


Tags: ,

BFG: Basic Shift pt 1- Gussets

It’s been a while since I’ve posted, which means that I have a back log to get through. Lets start off with a shift. Shifts contain the 2 “g” words that make a lot of people curse. Gussets and Gores. They aren’t difficult, just persnickety.  I’m going to try and break down the technique into small chunks.  I’ll be using the shift I needed to create for the Bavarian Dress as an example.

Step 1: Cut the pattern
This shift needed to sit about 1/2″ above the front seam of the Bavarian Dress. I used the same pattern to create the neckline. I tipped the pattern from the center line about 20°.This adds material at the center and sides of the dress. Allows me to create a fitted top in the arms and chest, and more flared at the waist where the gores will go.
WiggleRoom

I added a 1/2″ to the neckline of the pattern, above what as needed for a seam allowance. This puts the neckline at the proper distance from the dress.
seamAllowance
At this time cut out a second collar that is about 2″ deep. It should be the same size in as the shift. This will form the clean neckline.

Step 2- Cut out the gores and sleeves
On the fold, cut 2 triangles. I cut mine so the diagonal is about 1-2″ longer than the edge of side of my shift. I like a little wiggle room. I will trim out the excess later.Set these aside, we’ll come back to them in part 2.
gore

Step 3-Cut out the gussets
The gussets are just 5″ x 5″ squares of linen. 2 per side. Heat up your iron.

Step 4- Cut out the sleeves
The sleeves are large tapered rectangles. The top edge measures the same distance as the arm scythe.

Step 4- Attach the gussets to the sleeves
A. Find the top corner of your sleeve. Sew one edge of the gusset along the outer seam of the sleeve (not along the top edge)
GussetStep1

B. Find the opposite outer sleeve seam. Match this up with the diagonal that you have just sewn. This will skew your fabric slightly, but it works out in the end I promise. Continue the line to close up the full sleeve.
GussetStep2

C. Zigzag the edges.
BoundSeams

Step 5- Press and flip and press again
Press all the seams flat. Turn the sleeve right side out and press the seams again.
RightSide

Step 6- Sew the shoulder seams and neck line.
Sew your shoulder seams. Press. And then add the neckline. This is right side to right side, sew and clip. Do not flip the neck line at this time.*
ShiftNeck

Step 8- Attach the sleeves to the shift
This is where it gets “interesting”. You start the attachment of the gussets to the garment in the same fashion as step 4. But you are now going to take the right side out sleeve and “set it” into the arm scythe that hasn’t yet been sewn. You can pin this, but I like a little more freedom of movement. So I start with one side of the garment and work around the hole. Start by taking the free corner of the gusset and lining it up down the side of the shift.GussetToShirt1

When you start sewing, follow the line all the way around the scythe. You will be attaching the sleeve and the gusset at the same time. When you get to the end, sew the remaining seam to the shift. Continue down for another 1/2″. Leave the rest of the side open for the gores.**
GussetToShirt2

Step 7- Press and finish your seams
Run a zigzag stitch around the full sleeve. Flip and iron flat. Add a finishing seam to lock the edge down.
GussetComplete

Step 8- Repeat on the other side
Once you have the sleeves on, take a break. It will be time for part 2 and putting in the gores shortly.

*We did this technique in this post https://alysten.wordpress.com/2012/12/16/bfg-hidden-seams-in-lined-garments/. Rather than do a full lining, we are only doing a 2″ border.

**If you are sewing a man’s shirt (you can follow the same instructions), continue sewing down the full side of the shirt and stop at the hem line.

 
Leave a comment

Posted by on February 18, 2013 in BFG, Technique


Tags: ,

BFG: Hidden seams in lined garments

In today’s BFG, we are going to take a look at how to create a lined garment, with hidden seams.  This is one method for costume construction.  It is useful if you have easily irritated skin, as I do.  If the garment can be constructed with lining, this is my go to method for getting the smoothest lines against my body.

The easiest way to explain this is, you will making your garment twice. It does take 2x longer to do, but fortunately, most historical costumes are constructed using straight lines. And I rarely line the skirt. Since we are only talking about a bodice and maybe the sleeves, it’s not too bad. We will use the Bavarian as an example.

HRE tour: Bavaria- Dress design

Step 1:
Cut out your material according to your pattern. You will cut the pattern once with pretty/external facing fabric and once for lining. I am fairly symmetrical from the natural waist up. The 2 sides are close enough to each other that I can use the same pattern for both. If you are using material with a pattern, make sure you have placed the pattern in the correct direction. I’ve been costuming for a long time, and i still check it 3x before cutting. And even then, I still occasionally cut a piece the wrong way. As this is a historical costume, I am not as concerned with lining up all the patterns together.

Step 2:
Heat up your iron*. Sew the lining. Sew the pretty fabric. For the Bavarian,the pretty is the blue silk brocade and the lining is a complementary blue linen. You will now have 2 identical garments. To round out step 2, go press your seams flat in both parts.

Step 3:
Line up your garment, finished seam, to finished seam. This means you will be working with the Wrong Side facing out, from both garments. Sew these together.

Inside Out

Step 4:
Clip and flip. Clipping allows you to get crisp edged corners without warping.** Once you have clipped , you can turn your garment right side out.
Flip and Clip

Step 5:
Press your seams. Once pressed, you can run a 1/4 inch seam around the new edge. This keeps all the seams nicely sealed.
Pressed

If you are working with all linen, take the time to run a zig zag stitch over the raw edges, prior to step 4. This will help prevent fraying. The zig zag stitch is very useful if you do not own a serger (which I do not).
Seam Binding

*Note: The iron can make or break your outfits.  A well pressed seam helps your garment look crisp, clean, and it helps keep your lines clean while you are sewing. It will also help the garment sit better on your body. It is just as much of a work horse as your sewing machine.

**Note: This is a technique for machine sewing. If you are hand sewing, your technique around edges allow you to get the same effect without clipping. Clipping does cause a weakness in the fabric. However when used appropriately, you get wonderful results. The key is not to clip all the way down to the seam. You just need to nick V corners to get a clean line. With 90 corners, you snip a diagonal.

 
1 Comment

Posted by on December 16, 2012 in BFG, Technique


Tags: , ,

BFG- a new series of posts

I have been getting a lot of questions from people wanting to “step up” their costuming skills and general SCA wardrobe.  When I asked what would be useful, I got a resounding “show us from the ground up how to build a dress, kirtle, veil, smock, shift, socks, etc…”  And then I realized that I never blog the basic stuff.  I just kinda presumed that this kind of stuff is already out there for the learning. My resolution for the new year is to teach the basics to whomever wants to learn a little more about sewing, patterning and building nice, yet simple clothing.

Taking that a step further, maybe running some classes locally to help new folks learn to make quality clothes outside of the everyday t-tunic or elastic waist band skirts. I’ve also been asked to run a sewing machine 101 class, as many folks don’t know how to use what they already own.  We will also probable take a field trip to my fabric stash, to learn the different properties of synthetics vs natural fibers and how to tell the difference when you are in a fabric store.

But I digress. This is a post about the basics.  I will call them BFGs.  And hopefully making clothing will be less scarey.  I will post projects that I am working on, from the ground up.  You will see everything from design to process to finished product.  The first thing one I will be working on is a shift.  I need to make a new shift for the Bavarian, as I do not have anything that has a square neckline.

I hope these BFGs will be useful for folks.  And please let me know if there are things that you want to see done.  I am always working on foundation clothes.

 
2 Comments

Posted by on December 11, 2012 in BFG


Tags: , , , ,