In today’s BFG, we are going to take a look at how to create a lined garment, with hidden seams. This is one method for costume construction. It is useful if you have easily irritated skin, as I do. If the garment can be constructed with lining, this is my go to method for getting the smoothest lines against my body.
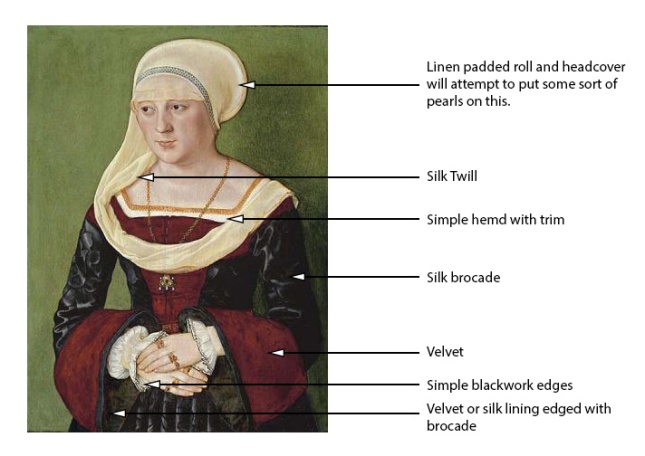
The easiest way to explain this is, you will making your garment twice. It does take 2x longer to do, but fortunately, most historical costumes are constructed using straight lines. And I rarely line the skirt. Since we are only talking about a bodice and maybe the sleeves, it’s not too bad. We will use the Bavarian as an example.
Step 1:
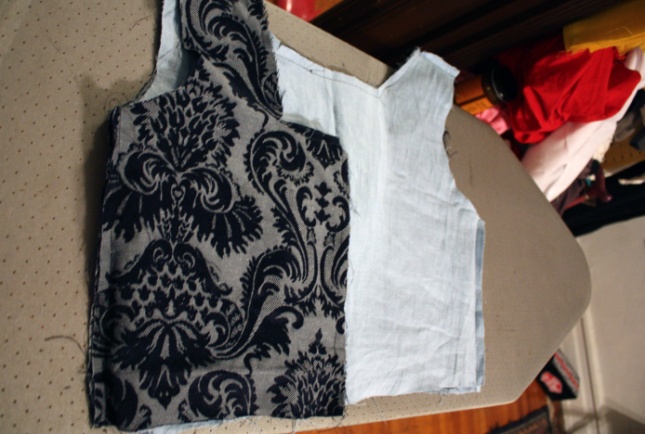
Cut out your material according to your pattern. You will cut the pattern once with pretty/external facing fabric and once for lining. I am fairly symmetrical from the natural waist up. The 2 sides are close enough to each other that I can use the same pattern for both. If you are using material with a pattern, make sure you have placed the pattern in the correct direction. I’ve been costuming for a long time, and i still check it 3x before cutting. And even then, I still occasionally cut a piece the wrong way. As this is a historical costume, I am not as concerned with lining up all the patterns together.
Step 2:
Heat up your iron*. Sew the lining. Sew the pretty fabric. For the Bavarian,the pretty is the blue silk brocade and the lining is a complementary blue linen. You will now have 2 identical garments. To round out step 2, go press your seams flat in both parts.
Step 3:
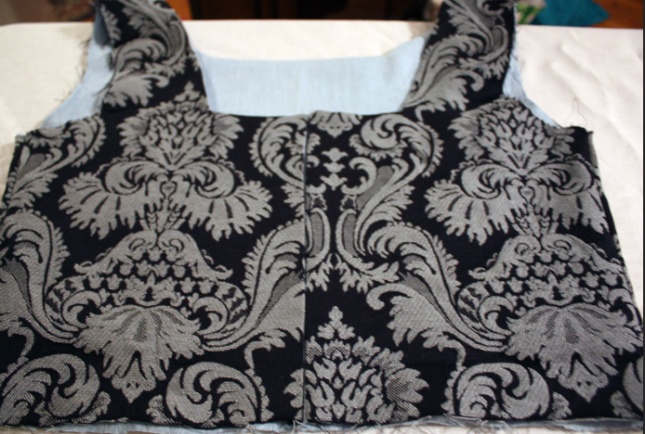
Line up your garment, finished seam, to finished seam. This means you will be working with the Wrong Side facing out, from both garments. Sew these together.
Step 4:
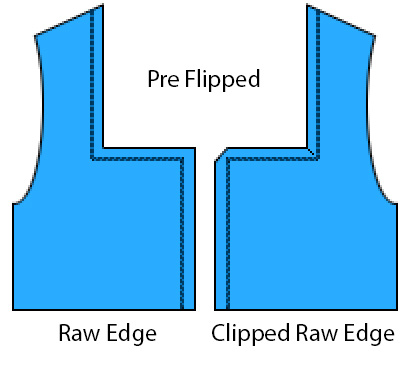
Clip and flip. Clipping allows you to get crisp edged corners without warping.** Once you have clipped , you can turn your garment right side out.
Step 5:
Press your seams. Once pressed, you can run a 1/4 inch seam around the new edge. This keeps all the seams nicely sealed.
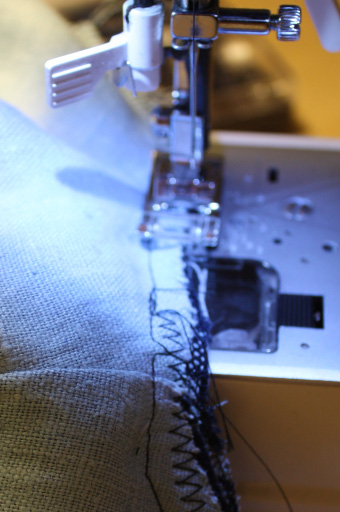
If you are working with all linen, take the time to run a zig zag stitch over the raw edges, prior to step 4. This will help prevent fraying. The zig zag stitch is very useful if you do not own a serger (which I do not).
*Note: The iron can make or break your outfits. A well pressed seam helps your garment look crisp, clean, and it helps keep your lines clean while you are sewing. It will also help the garment sit better on your body. It is just as much of a work horse as your sewing machine.
**Note: This is a technique for machine sewing. If you are hand sewing, your technique around edges allow you to get the same effect without clipping. Clipping does cause a weakness in the fabric. However when used appropriately, you get wonderful results. The key is not to clip all the way down to the seam. You just need to nick V corners to get a clean line. With 90 corners, you snip a diagonal.